Content Menu
● Introduction to Tube and Clamp Scaffolding
>> Planning and Preparation
>> Setting Up the Foundation
>> Installing Platforms and Guardrails
● Best Practices and Safety Considerations
● Advanced Techniques for Complex Projects
● Maintenance and Inspection Tips
● Conclusion
● FAQ
>> 1. What are the basic components of tube and clamp scaffolding?
>> 2. How are clamps tightened in tube and clamp scaffolding?
>> 3. What is the maximum vertical interval for horizontal members in tube and clamp scaffolding?
>> 4. What type of planking should be used for tube and clamp scaffolding platforms?
>> 5. What safety factor should tube and clamp scaffolding be designed to support?
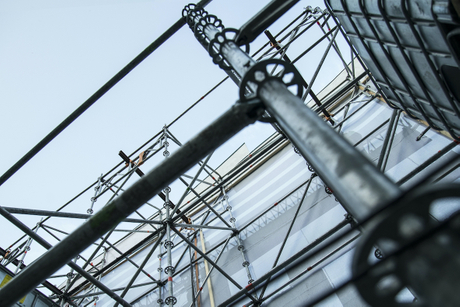
Tube and clamp scaffolding is one of the most versatile and adaptable scaffolding systems used across the construction industry. Its modularity and flexibility allow it to be configured for almost any job site, making it the preferred choice for complex, irregular, or high-load structures. This comprehensive guide will walk you through every step of the process, from planning and preparation to advanced bracing techniques, with a strong focus on safety and efficiency.

Introduction to Tube and Clamp Scaffolding
Tube and clamp (also called tube and coupler) scaffolding is a system built from steel tubes and clamps (couplers) that connect the tubes at right angles or any desired angle. This system is favored for its:
- Flexibility in design
- Strength and stability
- Adaptability to irregular or obstructed spaces
- Ability to support heavy loads and multiple platforms
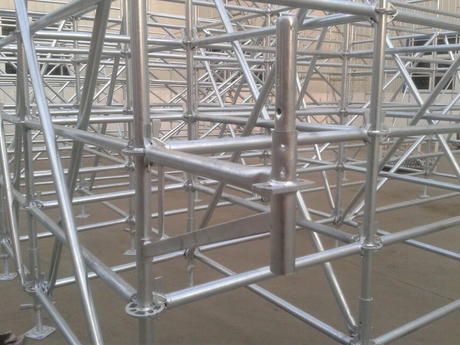
Basic Components:
- Base Plates: Distribute the scaffold's weight evenly.
- Galvanized Steel Tubing: Available in various lengths, typically from 4 to 16 feet.
- Right Angle Clamps: Connect tubes at 90°.
- Swivel Clamps: Connect tubes at any angle.
- Bearers and Runners: Horizontal members for support and spacing.
- Platforms: Scaffold-grade planking for worker access.
Planning and Preparation
1. Site Assessment and Hazard Analysis
- Inspect the job site for hazards: unstable ground, overhead power lines, obstructions, and access points.
- Conduct a hazard assessment and ensure all workers are trained and equipped with necessary PPE (hard hats, gloves, harnesses, etc.).
2. Design and Layout
- Prepare a detailed drawing of the scaffold structure, including dimensions, platforms, braces, ladders, and anchor points.
- Determine the load requirements and ensure the design supports at least four times the maximum intended load.
3. Gather Materials and Tools
- Ensure all tubes, clamps, and accessories are inspected for damage or wear.
- Use only manufacturer-recommended tools, such as a tube and clamp wrench for tightening to 45 ft-lbs.
Setting Up the Foundation
1. Prepare the Ground
- Level the ground and use mudsills or timber sills on soft or unstable surfaces to prevent settling.
- Place base plates on each leg to distribute the load.
2. Install Base Plates and Sills
- Center base plates on sills and secure them if necessary.
- For sloped surfaces, always start at the highest point and work downhill.
3. Erect the First Bay
- Insert the first vertical post (at least 8 ft long) onto the base plate.
- Attach the bottom bearer (horizontal support for planking) as close to the ground as possible, but no higher than 12 inches to allow for runners and diagonals.
- Attach runners (horizontal spacers) to the inside and outside posts at intervals not exceeding 6 ft 6 in vertically.
4. Square and Level the Scaffold
- Use the 3-4-5 triangle method to ensure the bay is square: measure 3 ft along the bearer, 4 ft along the runner, and the diagonal should be 5 ft.
- Plumb and level all posts and horizontals as you proceed.
5. Add Additional Bays
- Mark center-to-center spacing for posts (typically 7 ft apart).
- Repeat the process for each bay, connecting frames and ensuring all clamps are fully tightened immediately after placement.
Installing Platforms and Guardrails
1. Install Platforms
- Use only scaffold-grade planking for platforms.
- Place planks securely on bearers, ensuring full support at both ends and at intermediate supports if required.
2. Set Up Guardrails and Access
- Install guardrails and midrails on all open sides and ends of platforms.
- Secure ladders or stair systems for safe access to all working levels.
3. Toe Boards and Debris Nets
- Install toe boards along all platform edges to prevent tools or materials from falling.
4. Install Bracing
- Attach diagonal braces from the bottom to the top of the scaffold on both front and back faces to prevent sway and maintain rigidity.
- Reverse bracing direction on alternate bays for added stability.
5. Tie Scaffold to Structure
- For tall or large scaffolds, tie the structure to the building at intervals not exceeding 20 ft horizontally and 15 ft vertically.
- Use plan bracing at every tier that has a tie-in.
6. Final Inspection
- Check that all clamps are tightened to the specified torque.
- Ensure all posts are plumb, and the scaffold is level and secure.
Best Practices and Safety Considerations
- Only qualified, experienced personnel under competent supervision should erect, alter, or dismantle scaffolding.
- Inspect the scaffold before each use for alterations, damage, or missing components.
- Never use makeshift materials or substitute parts.
- Always comply with local, state, and federal safety regulations.
- Use fall protection systems as required by regulations and site conditions.
Additional Safety Tips:
- Never overload the scaffold. Always calculate the total weight of workers, tools, and materials.
- Keep platforms free of debris and obstructions to reduce tripping hazards.
- Do not move or alter the scaffold while it is in use or occupied.
- Use tag lines or hoists to lift materials to upper levels rather than carrying them up ladders.

Advanced Techniques for Complex Projects
- Irregular Structures: Use swivel clamps to adapt to non-rectangular or obstructed areas.
- Multiple Platforms: Ensure each platform is independently braced and tied to the structure as needed.
- Heavy Loads: Consult engineering guidelines and use additional bracing or support for high-load applications.
- Cantilevered Sections: For overhangs or projections, use additional diagonal bracing and tie-ins to maintain stability.
Special Note on Weather Conditions:
- In windy or adverse weather, additional tie-ins and bracing may be necessary.
- Always check for ice, snow, or rain accumulation on platforms and remove it before use.
Maintenance and Inspection Tips
Proper maintenance and regular inspection are crucial to ensure the ongoing safety and effectiveness of tube and clamp scaffolding:
- Daily Inspections: Check for loose clamps, damaged tubes, and signs of rust or corrosion.
- Weekly Audits: Conduct a more thorough inspection, including all tie-ins, bracing, and access points.
- After Severe Weather: Inspect for movement, settling, or water damage to the foundation and components.
- Record Keeping: Maintain a log of inspections, repairs, and modifications for compliance and safety tracking.
Conclusion
Erecting tube and clamp scaffolding requires careful planning, precise execution, and strict adherence to safety standards. Its flexibility makes it ideal for challenging job sites, but also demands a methodical approach to ensure stability and worker safety. By following the step-by-step process outlined above—planning, foundation, frame assembly, platform installation, and bracing—you can build a safe and efficient scaffold structure for any project. Regular inspection and maintenance further ensure that the scaffold remains a secure platform for all construction activities.

FAQ
1. What are the basic components of tube and clamp scaffolding?
Tube and clamp scaffolding consists of three main components: base plates, galvanized steel tubing (in various lengths), and clamps (right angle and swivel). Right angle clamps connect tubes at 90°, while swivel clamps allow connections at any angle.
2. How are clamps tightened in tube and clamp scaffolding?
Clamps are tightened using a tube and clamp wrench to a torque of 45 foot-pounds. This ensures a secure connection and prevents movement or slippage during use.
3. What is the maximum vertical interval for horizontal members in tube and clamp scaffolding?
Horizontal members (runners) should be installed at vertical intervals not exceeding 6 ft 6 in (2 meters) to maintain scaffold stability and comply with safety standards.
4. What type of planking should be used for tube and clamp scaffolding platforms?
Only scaffold-grade planking should be used for platforms. These planks are specifically designed and tested to support the loads encountered in scaffolding applications.
5. What safety factor should tube and clamp scaffolding be designed to support?
Tube and clamp scaffolding must be designed to support at least four times the maximum intended load to ensure safety under all working conditions.