Content Menu
● Introduction to Kwikstage Scaffolding
● Components of the Kwikstage Scaffolding System
● Pre-Assembly Checks
● Step-by-Step Assembly Procedure
● Safety Considerations
● Erecting Internal Corners
● Kwikstage vs. Other Scaffolding Systems
● Conclusion
● FAQ
>> 1. What are the main components of a Kwikstage scaffolding system?
>> 2. How do you ensure the stability of a Kwikstage scaffold?
>> 3. What surface treatments are commonly used for Kwikstage scaffolding?
>> 4. Can Kwikstage scaffolding be used for internal corners?
>> 5. What safety measures should be followed when assembling Kwikstage scaffolding?
● Citations:
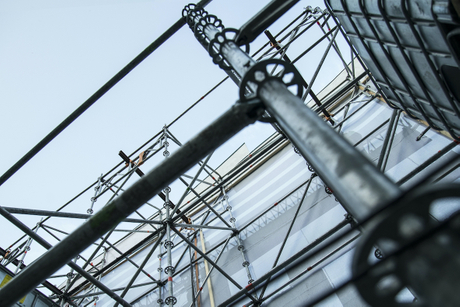
Kwikstage scaffolding is a versatile and efficient modular system widely utilized in the construction industry to provide safe and reliable access at varying heights. Known for its ease of assembly and adaptability, the kwikstage scaffolding system is a popular choice in regions such as the UK, Ireland, Australia, South Africa, and the Gulf. This comprehensive guide provides a detailed overview of assembling a kwikstage scaffolding system, ensuring a secure and stable working platform.

Introduction to Kwikstage Scaffolding
Kwikstage scaffolding, also referred to as quick stage scaffold, is a modular system characterized by its straightforward design and rapid assembly[2]. The system comprises prefabricated components that connect using wedge locking mechanisms, making it easy to erect and dismantle[2]. Key components include kwikstage standards, ledgers (horizontals), transoms, base jacks, diagonal braces, and scaffold boards[2].
Key Features of Kwikstage Scaffolding:
- Easy to Erect: The modular design and wedge locking system allow for quick and straightforward assembly[2].
- Versatile in Use: Kwikstage scaffolding can be adapted for various applications, including construction, maintenance, and event staging[2].
- Fast & Quick: The rapid assembly and dismantling reduce project timelines[2].
- Heavy Duty Load: Designed to support substantial loads, ensuring a safe working environment[2].
- Safety Secure: The robust construction and secure connections provide a stable and safe platform[2].
- Reliable: Manufactured to high standards, ensuring long-term reliability and durability[2].
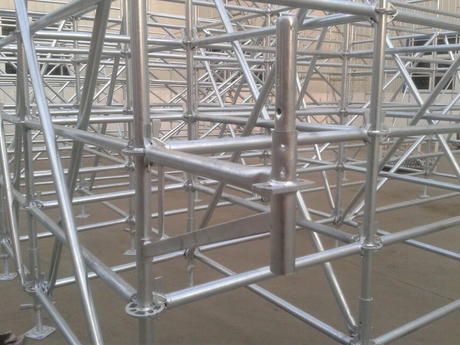
Components of the Kwikstage Scaffolding System
Understanding the components of a kwikstage scaffolding system is crucial for proper assembly. Each component plays a specific role in ensuring the stability and safety of the structure.
1. Kwikstage Standards (Uprights): Vertical supports with V-pressings or stars at fixed intervals for connecting ledgers and transoms[2].
2. Ledgers (Horizontals): Horizontal tubes that connect to the standards, providing lateral support and creating bays[2].
3. Transoms: Shorter horizontal tubes placed between ledgers to support scaffold boards[2].
4. Base Jacks: Adjustable bases used to level the scaffold and distribute the load evenly[2].
5. Diagonal Braces: Angled supports that add stability to the scaffold structure[2].
6. Scaffold Boards: Planks placed on the transoms to create a working platform[2].
7. Tie Bars: Provide side protection, especially for bracketed scaffolds[2].
8. Hop-Up Brackets: Used to extend the working platform beyond the main scaffold structure[1].
9. Toe Boards: Vertical boards fixed along the edges of the platform to prevent tools and materials from falling[2].
Pre-Assembly Checks
Before starting the assembly, it is essential to perform several pre-start checks to ensure safety and stability[1].
- Check the Load Capacity: Ensure the scaffold can support the intended loads[1].
- Inspect Components: Verify that all components are in good condition, free from damage or corrosion[3]. Remove any damaged equipment from the job site[3].
- Level the Ground: Ensure the ground is firm and level to provide a stable base for the scaffold[1]. An adequate sill or pad must be set on the scaffold base to prevent slipping or sinking[3].

Step-by-Step Assembly Procedure
The following steps detail the assembly of a kwikstage scaffolding system.
Step 1: Setting Up the Base Jacks
1. Position Base Jacks: Place adjustable base jacks on the ground where the standards will be located[2].
2. Level the Base Jacks: Use a spirit level to ensure the base jacks are level, adjusting them to the desired height[1].
Step 2: Installing the Standards
1. Place Standards: Position the kwikstage standards onto the base jacks[2].
2. Secure the First Lift: Insert ledgers into the lowest set of V-pressings on the standards; do not fully tighten the wedges at this point[4].
Step 3: Connecting the Ledgers and Transoms
1. Attach Ledgers: Connect ledgers to the standards at the desired height, ensuring they are securely locked in place with wedge pins[2].
2. Install Transoms: Position 1.2m transoms between the ledgers at regular intervals to support the scaffold boards and secure the transoms at the fourth V-pressing on both opposite sides of the bay[1][2].
Step 4: Adding Diagonal Braces
1. Position Braces: Attach diagonal braces to the standards to enhance the stability of the scaffold structure[2].
2. Secure Braces: Ensure the braces are properly connected and tightened[1].
Step 5: Decking the Platform
1. Place Scaffold Boards: Lay scaffold boards across the transoms to create the working platform[2].
2. Secure Boards: Ensure that the ends of the planks are held in place by the two opposite supporting transoms[1].
Step 6: Installing Toe Boards
1. Attach Toe Boards: Fix toe boards around the perimeter of the platform to prevent materials from falling[2].
Step 7: Adding Additional Lifts (If Required)
1. Repeat Steps: Repeat steps 2 to 6 to add additional lifts and achieve the desired height[1]. At the fourth vertical V-pressing, construct a second lift[1].
2. Ensure Alignment: Ensure the scaffold structure is leveled and in line as you build upwards[1].
Step 8: Installing Hop-Up Brackets (If Required)
1. Secure Brackets: Secure the hop-up brackets on either side of the standards to extend the working platform[1].
2. Position Planks: Position planks on top of the hop-up brackets to create the extended platform[1].
Step 9: Adding Longitudinal Bracing
1. Position Bracing: Install longitudinal bracing (face brace) on the outside row of the scaffold standard to enhance stability[1].
Safety Considerations
- Follow Regulations: Always comply with state, local, and federal codes, ordinances and regulations pertaining to scaffolding when erecting and using kwikstage scaffolding[3].
- Use Fall Arrest Equipment: Always comply with local safety regulations by either using approved fall arrest equipment or by providing temporary guardrails[4].
- Regular Inspections: Erected scaffolds should be continually inspected by users to be sure that they are maintained in safe condition[3]. Report any unsafe condition to your supervisor[3].
- Never Take Chances: If in doubt regarding the safety or use of the scaffold, consult your scaffold supplier[3].
- Do Not Overload Platforms: Use properly designed loading towers and ensure that crane and forklift drivers understand loading restrictions on each part of the scaffold structure[7].
Erecting Internal Corners
When providing a kwikstage scaffold for buildings with internal corners, start the erection from those internal corners.
1. Mirrored Corners: Use a mirrored version of the method for forming external corners.
2. Square Tower: Form a square tower in the corner and connect bays to that tower.
3. Transom Placement: Use transoms of the appropriate length in place of ledgers.
4. Standard Orientation: Orient the standards so that the transoms fit into a lower ‘V' pressing of the bottom cluster.
Kwikstage vs. Other Scaffolding Systems
Kwikstage scaffolding is one of several types of modular system scaffolds available. Here's a comparison with two other common systems:
| Feature | Kwikstage Scaffolding | Cuplock Scaffolding | Ringlock Scaffolding |
| Locking System | Wedge pins that lock with stars on the standards | Top cup and bottom cups on verticals and ledger blades on horizontals | Rosette rings on verticals and cast steel ledger heads and wedge pins on horizontals |
| Erection | Quick erection with wedge locking system | Top and bottom cups lock horizontal blades to form frames | Horizontal wedge pins lock with the rosette of the standards |
| Surface Treatment | Painted, powder-coated, or galvanized | Typically galvanized | Always hot-dip galvanized |
| Durability | Varies based on surface treatment | Generally durable | Highly durable and resistant to rust |
| Common Use | Construction and staging | Modular system construction | Construction buildings and concrete shoring |
Conclusion
Assembling a kwikstage scaffolding system requires careful planning, a thorough understanding of the components, and strict adherence to safety guidelines. By following the steps outlined in this guide, you can ensure a safe, stable, and efficient working platform for various construction and maintenance tasks. Always prioritize safety, conduct regular inspections, and consult with experienced professionals when in doubt. Ensure all people using the scaffold are aware of the purpose for which it is intended to be used and the maximum loading to which it can be subjected[7].

FAQ
1. What are the main components of a Kwikstage scaffolding system?
The main components include kwikstage standards (uprights), ledgers (horizontals), transoms, base jacks, diagonal braces, scaffold boards, tie bars, hop-up brackets, and toe boards[2].
2. How do you ensure the stability of a Kwikstage scaffold?
Stability is ensured by using diagonal braces, leveling the base jacks, and ensuring all connections are securely locked with wedge pins[1][2].
3. What surface treatments are commonly used for Kwikstage scaffolding?
Common surface treatments include painting, powder coating, cold galvanizing, and hot-dip galvanizing[2]. Hot-dip galvanized scaffold is the most durable kwikstage scaffolding treatment which can last more than 20 years without rust[2].
4. Can Kwikstage scaffolding be used for internal corners?
Yes, Kwikstage scaffolding can be adapted for internal corners by using mirrored corner setups or forming a square tower in the corner and connecting bays to it.
5. What safety measures should be followed when assembling Kwikstage scaffolding?
Always comply with local safety regulations, use approved fall arrest equipment, and conduct regular inspections of the scaffold to ensure it remains in good condition[3][4].
Citations:
[1] https://www.wm-scaffold.com/wp-content/uploads/2021/06/Kwikstage-Scaffolding-Manual.pdf
[2] https://www.wm-scaffold.com/kwik-stage-scaffold.html
[3] https://www.kwikup.com.au/kwikup-safety-information/
[4] https://kitformwork.co.za/wp-content/uploads/Kwikstage-compressed.pdf
[5] https://www.youtube.com/watch?v=VR1NXzaFYCk
[6] https://www.wacokwikform.com.au/wp-content/uploads/Guidelines-Safe-Use.pdf
[7] https://www.barrattcommercialsupport.co.uk/uploads/appendix-20---kwikstage-user-guide.pdf?v=1535466853
[8] https://www.youtube.com/watch?v=YBg-K1vOoOk